The Key Vault VM extension support these Linux distributions:
Ubuntu 20.04, 22.04
Azure Linux
I tested the available offers and Alma Linux, OpenLogic (CentOS), Microsoft Azure Batch (CentOS Container) all result in unusable nodes. Any offer using Ubuntu, Azure Linux (Mariner) and of course Microsoft Windows will work. I really hope this helps others out there!
In this post, I’m going to show you how we can bypass the Azure Active Directory (Azure AD) sign-in prompt. As with most Microsoft Apps that use Azure Active Directory for authentication, you will get this familiar prompt when signing in for the first time:
In some cases if you’ve signed-in already, the username will be pre-populated but you still need to click on it to proceed. Of course, Azure AD needs to know who you are to redirect you to the correct tenant. But if the user has already authenticated, this might be unnecessary. The use cases where we don’t need the sign-in prompt would be when we’re certain the user doesn’t need to switch tenants. For instance, if we have a portal with a list of corporate applications (like a corporate intranet), clicking on those applications shouldn’t require user selection because we can confidently say that the user intends to stay on our tenant. This can also be useful when the user may not know their UPN (perhaps, Alternate Login ID is not setup or can’t be).
How can we solve it?
For some Microsoft Apps, we have Smart Links which use Windows Home Realm (WHR) feature as part of ASP.NET. Fellow Microsoft geek Jack Stromberg has a nice utility on his blog to generate Smart Links. But, this doesn’t work for Windows Virtual Desktop because it uses OpenID Connect (which is built on OAuth 2.0). We can however construct a URL that will work for Windows Virtual Desktop using domain hints. This URL is going to be very long, however in our use case the URL will be hidden behind a button, icon, or hypertext on a webpage so our user’s don’t need to know anything about it.
Constructing the URL
Let’s break down how the URL needs to be constructed:
https://login.microsoftonline.com/common/oauth2/v2.0/authorize?: Azure AD OAuth 2.0 endpoint
response_type=id_token&: This must be id_token.
scope=https://www.wvd.microsoft.com/.default openid profile&: The scope must include OpenID (“Sign you in” permission) and can include other scopes.
client_id=a85cf173-4192-42f8-81fa-777a763e6e2c&: This is the id of “Windows Virtual Desktop Client” as documented on Microsoft Docs.
redirect_uri=https://rdweb.wvd.microsoft.com/arm/webclient&: HTML5 web client URL as documented on Microsoft Docs.
domain_hint=contoso.com&: The validated domain in Azure AD for the tenant where authentication should occur. Change this to your domain.
response_mode=form_post&: HTTP POST
nonce=11128bbe-070f-4ec8-a5f5-0ccb78db7d5e: A nonce is required per the documentation and should be dynamically generated (more on that below).
You can find out more about each parameter in the URL by reviewing Microsoft identity platform and OpenID Connect protocol – Microsoft identity platform | Microsoft Docs. Everything in this URL can be hard-coded except for the nonce, which must be dynamically generated to prevent token replay attacks. For a lab, you could pass 1 or more digits and things will work fine. In a production scenario you would need to find a way to generate the nonce dynamically. There are many ways to do this but a simple suggestion would be to randomly append some numbers using JavaScript when the page loads. Here’s how the fully constructed URL looks:
Now, when the user clicks on the WVD icon, the browser gets redirected to the URL which already contains a domain hint, the tenant to which we want to sign-in and the application (rdweb) so no more. If the user has previously logged in (for instance to our corporate intranet or portal page), they won’t need to type in a password, perform MFA, or other interactions. This works well for federated Azure AD domains as well (e.g., Azure AD using AD FS).
In this post, I’ll discuss a few solutions for auto-scaling Windows Virtual Desktop session hosts and how they compare. I won’t be looking at personal desktops.
We’ll explore five solutions:
Windows Virtual Desktop Scaling Tool (Microsoft)
Ciraltos Scale Host Pool (Ciraltos)
Jason Parker’s Scale Optimizer
Nerdio Manager for WVD (Nerdio)
Project MySmartScale (Sepago)
Before we dive in, let’s keep in mind the load balancing options:
Depth-first fills up the first machine before allowing sessions on the next machine. Because it requires fewer machines at first, this option can be cost effective and doesn’t waste resources (CPU time). However, it could reduce the user experience since we try to cram users on to fewer hosts. As users log off, this option creates new sessions on the host with the most users, optimizing for user density.
Breadth-first distributes sessions evenly across all available hosts. The user experience is usually better because it’s more likely that there are fewer users on each host and each user has access to the hosts resources. But because more machines are turned on, even if utilization is low, it can be more costly and harder to scale down.
WVD Scaling Tool (Microsoft)
The WVD Scaling Tool is a fully supported auto-scale solution maintained by Microsoft. During peak times, it evaluates if additional hosts are required by comparing SessionThresholdPerCPU to the current number of sessions and the current capacity. During off-peak times, it evaluates if hosts can be shut down based on a MinimumNumberOfRDSH.
Technology: The solution uses an Azure Automation account with webhook, PowerShell runbook and Azure Logic App. The Automation account has a RunAs Managed Identity with limited ability to start/stop machines.
Modifies drain mode: Yes, during off-peak (optional).
Can create VMs: No
Evaluation Frequency: Recommended to be 15 minutes.
You can use an Azure Tag defined in MaintenanceTagName to distinguish hosts managed by the tool versus those you manage manually. The tool will also use MaxSessionLimit to calculate if 90% of maximum capacity has been reached and if so, start an additional host. This happens during peak or off-peak times.
The main limitations with the tool are that it only supports pooled multi-session VMs, scaling out is only done during peak times and scaling in is only done during off-peak times.
The @Ciraltos solution from Travis Roberts calculates scaling by comparing running session host count to a target session host count. This target is calculated by counting the active sessions and adding a buffer/spare capacity (threshold) and then dividing by the maximum sessions configured. Because of this threshold, the solution can start the process of turning on a host (or hosts) to minimize the situation where there’s no capacity for the next set of users.
Technology: Azure Function app with Managed Identity with limited ability to start/stop machines.
Modifies drain mode: No
Can create VMs: No
Evaluation Frequency: Can go as low as 5 minutes. For anything lower, it’s possible to get false starts since it can take a few minutes for a VM to boot up.
The solution has an option that can change the load balancing option from depth-first to breadth-first during peak time. This is useful during peak times because it will start all available session hosts and start to distribute sessions across them. Once peak time ends, the solution reverts the change and shutdown session hosts as users log off. If hosts need to be started but none are available, the solution will provide an error message. It would be useful to monitor for this.
Note: The solution requires a maximum session limit to function. The maximum session limit is how it knows when to start distributing sessions to another host (when the max is reached).
Compared to the Microsoft tool, this solution uses depth-first to consolidate sessions and evaluates scaling based on session (a.k.a user) count instead of sessions per CPU core. This solution does not scale in breadth-first, unlike the Microsoft solution which should help with user experience but limits potential cost savings.
The main limitations for this solution is that only supports pooled multi-session VMs, it does not manage drain mode, can not force log off users during off-peak times.
A fellow Microsoft employee, Jason Parker created an auto-scale solution that is tied to a specific deployment model, particular useful in very large deployments. It works by comparing the running session host count to a target session host count. These values are calculated based on the number of user sessions and you can define the minimum and maximum thresholds. The solution determines the optimal state (for instance, 6 additional hosts are needed) and then automates towards that state instead of a one-by-one approach.
Technology: Azure Automation account and PowerShell runbooks.
Peak time supported: Yes (excludes weekends)
Modifies drain mode: Yes
Can create VMs: No
Evaluation Frequency: Recommended to be 15 minutes since it’s using an Azure Automation account
The Scale Optimizer uses two PowerShell runbooks: one with the logic to check if a Host Pool is compliant with it capacity settings and another which performs the actual scaling. The solution can take hosts out of drain mode to make them available and/or start additional hosts if needed. For scaling in, it can set hosts to drain mode (if there are active sessions) and then stop them once there are no more sessions.
The Scale Optimizer solution logs everything to a Log Analytics workspace and sets a maintenance tag automatically if an operation did not complete successfully.
The main limitations for this solution is that only supports pooled multi-session VMs, can not force log off users during off-peak times.
To learn more about this solution, check out the code and README on GitHub at this repository.
Nerdio Manager for WVD
Nerdio Manager for WVD is a fully supported solution offered through Azure Marketplace (not free) that uses several different auto-scale algorithms, including the ability to scale single session desktops. While Nerdio makes other products, I will be using the word “Nerdio” to refer to the Nerdio Manager for WVD in this blog post.
For multi-session hosts, Nerdio has three triggers it can use for scaling: CPU usage, average active sessions, or available sessions. The CPU usage looks at all hosts in the host pool to determine if scaling is necessary based on a minimum and maximum threshold set by the administrator. If the threshold is met, Nerdio scales out (or scales in) hosts in increments specified by the user. Further, you can set a time period (such as 5pm to 8am) to permit scaling in, effectively blocking scaling in during the workday. The average active sessions trigger works similarly and has the same features but looks at the average active sessions specified by the administrator. This is especially important for scenarios using breadth-first where user experience is more important than reducing cost. Finally, the last trigger is the available sessions trigger. With this, the same features apply but it looks at the max sessions per host. Once this max is reached in the host pool, Nerdio will start scaling out by an amount specified by the administrator. This is similar to the Ciraltos solution above.
Technology: Azure Marketplace solution in your subscription
Peak time supported: Yes
Modifies drain mode: Yes
Can create VMs: Yes
Evaluation Frequency: Can be set as low as 5 minutes for triggers that use metrics.
Like the other solutions presented in this post, Nerdio runs in your Azure environment using native Azure services such as App Service, Azure Automation, Key Vault, SQL Database and others. This means that your WVD environment is not dependent on Nerdio, it can be completely removed with no impact to your environment. However, Nerdio brings some value added features besides a nice web-based GUI to manage auto-scale settings. For instance, it introduces the concept of “Dynamic” host pools. Dynamic Host Pools were created to address some auto-scaling challenges.
Dynamic Host Pools are host pools that can be scaled in or out not just by turning off and turning on existing hosts but it can actually create and delete hosts. This enables you to have burst capacity, beyond the initial machines created. Once scaling determines there are no more machines to turn on, it can start creating new ones automatically using your naming convention. Once those hosts are no longer needed, they can be deleted.
In addition, Nerdio can pre-stage hosts on the specified days and time (for instance, all work days at 8am) to ensure there is available capacity. The administrator will set the number of active hosts needed and Nerdio uses scale out features to achieve that number. And finally, Nerdio can auto-heal hosts if there is a problem by restarting or recreating them.
While there is a license cost for Nerdio Manager for WVD, it would be worthwhile to explore the cost savings from the advanced auto-scale and other features (like Ephemeral Disks) to check if the license costs can be offset.
The main limitations of this solution is that there is no auto-scale options for static host pools (therefore, you must use Dynamic Host Pools) and it cannot be customized beyond what the vendor permits.
To learn more about this solution, visit the vendor’s website at https://www.getnerdio.com where you can access a free trial.
Project MySmartScale
Project MySmartScale was developed by Microsoft MVP Marcel Meurer and has a free community version and a fully supported version from Sepago. One unique feature of this solution is its ability to predict the number of session hosts needed before users logon, preventing resource constraints during logon storms. It learns about user behaviors and logs off sessions at the right time to smartly deallocate and start session hosts.
Technology: Azure App Service, Log Analytics and Azure SQL Database using Managed Identity which has limited privileges to start/stop machines (VM Contributor) and Read Groups/Users in Azure AD.
Modifies drain mode: No
Can create VMs: No
Evaluation Frequency: Can go as low as 5 minutes. For anything lower, it’s possible to get false starts since it can take a few minutes for a VM to boot up.
The solution uses a custom agent that is optional (for WVD Spring release) but provides additional features to logoff idle users and get data on connected/disconnected sessions. Unlike configuring logoff via Group Policy, with Project MySmartScale, you can define idle times in 5 minute intervals – useful to prevent logoff if you’re only idle for a short time (driving home from work or taking your lunch break). Further, you can set conditions based on days of the week and even time of day (define working hours).
Another great feature of this solution is the web-based user interface (UI). The UI (admin portal) is hosted in your own subscription and you can perform your configuration through it. The admin portal dashboard shows high-level information such as session count, active session hosts, and average sessions per host. It’s easy to update the admin portal and you can manage additional host pools by adding them to the UI. The solution logs everything to a Log Analytics workspace.
The main limitations of this solution is that you need to deploy a custom agent for some features and does not manage drain mode.
To learn more about this solution, check out the code and README at this repository on GitHub (Community version limited to 5 session hosts).
Closing
There are several solutions to choose from and I’m sure I didn’t capture all of them so if you know of others, please let me know. Also, if I have made mistakes on assessing any of the solutions, I’d be happy to correct it. Most information is from the provided documentation and limited testing.
Tip: Remember to apply a policy to force log off idle or disconnected sessions (Policies > Computer Configuration > Administrative Templates > Windows Components > Remote Desktop Services > Remote Desktop Session Host > Session Time Limits).
Here’s a table that attempts to summarize the options presented here:
I’m conducting some training for Azure and need a way for students to get a domain name. In this post, I’ll show you how to get one for free and use Azure DNS to manage it.
Enter your desired domain name in the box. Use one of the following extensions
.tk
.ml
.ga
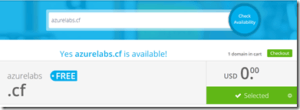
.cf
.gq
Here’s the one I chose:
Click checkout. The period can be anywhere from 1 month to 12 months to keep it free. Or for longer periods, the cost is displayed. I’ll leave mine at the default of 3 months and press Continue.
Since I don’t have an account, I can create a new one. I used the social sign in to Google. A confirmation email will be sent.
After clicking the link in my email to verify my account, I’m back at the checkout screen. Fill in your name, address, and phone number.
Select the box after you’ve read the Terms and Conditions and then press Complete Order.
You should be automatically logged in to the client area.
To view your domain, you click on Services, then My Domains and you should see the domain you just registered.
Manage it with Azure DNS
One of the limitations with the Freenom DNS is that you can’t add wildcard records. Wildcard records are often needed to verify your domain and to make managing DNS easier. For instance, to use this domain with Azure Active Directory, you must enter a wildcard TXT record. Let’s manage the domain with Azure DNS.
Click on Services from the top menu, then My Domains
Click Manage Domain for the domain you want to modify.
In the management menu, click Management Tools and select Nameservers.
On the Nameservers screen, select Use custom nameservers. Then enter the name servers provided by your instance of Azure DNS.
Finally, click Change Nameservers. Azure DNS is now managing DNS for your domain.
Now that Azure DNS is managing your domain, you can create DNS records for your blog, other website, mail domain or other things. Let’s add a custom domain for Azure AD:
Browse to Azure Active Directory and select custom domain names in the blade, or go to the direct link here.
Next, click Add custom domain and type in your domain name. Click Add domain on the new blade.
Once the domain is added, the verification screen comes up.
The verification screen provides the information needed to populate Azure DNS. Copy the destination value.
In the Azure Portal, go to your DNS zone and click add (+) Record set. For the Name, type the @ symbol. Change Type to TXT and paste the value from the step above into the Value field. Click OK.
Navigate back to Azure Active Directory, Custom domain Names. You should see your domain name and it’s status as Unverified. Click your domain.
Now that you’ve added the TXT record to Azure DNS, click Verify.
Azure attempts to verify the domain. It can take several hours or days for all of these changes to propagate. If it doesn’t work the first time, try again later (after several hours). Once it’s successful, you’ll see that the status is changed to Verified.
You can now use this domain in Azure AD as a UPN suffix. You can also setup public-facing websites, such as an ADFS server and add records to Azure DNS so that users can access it to perform single sign-on.
Recently I was working on doing infrastructure deployments using Azure DevOps Pipelines. One of the first things that needs to be done is to create a Service Connection to the target environment. In my case, my target environment is an Azure Subscription and I’ll use a Service Principal with an ID and Key (versus a Certificate) for authentication. However, we want to avoid storing this authentication information and we want it automated.
I also don’t want my Service Principal to have broad privileges so it’s scope will be limited to a single Resource Group. Let’s create several Resource Groups, a Service Principal for each one, assign it privileges and create a corresponding Service Connection in Azure Dev Ops
Oh, so many parameters
First, let’s define some parameters and set some variables. Most of these are self-explanatory:
The $apps parameter is a hashtable that will be used in the name of the Resource Group name and Service Principal. The number next to each one is part of my Resource Tags.
Next, we’re going to login while saving the context so we can gather more variables:
We’re almost ready to get to work. Since we have 3 Resource Groups defined in $apps (and could easily expand this to several dozen), we need a foreach loop. We’ll also set some additional variables:
These variables are just setting the names of the Resource Groups and Service Principal. If you have a different standard, modify these. Also, this is where we set the scope to the Resource Group. If you prefer to have a Subscription-wide scope, just remove /resourceGroups/$rgName.
Next, we’ll create the Resource Group and Service Principal using these values:
        #Create Resource Group
        If ((Get-AzResourceGroup -Name $rgName -ErrorAction SilentlyContinue) -eq $null)
            {
            New-AzResourceGroup -Location $location -Name $rgName -Tag $tags | Out-Null
            }

        #Create Service Principal
        If ((Get-AzADServicePrincipal -DisplayName $spName) -eq $null)
            {
            #Create Service Principal and assign rights. This can take a minute.
            $sp = New-AzADServicePrincipal -DisplayName $spName -Scope $scope  `
-Role Contributor -WarningAction SilentlyContinue
            }

        $spNameId = $sp.ServicePrincipalNames | ? {$_ -notlike "http*"} | select -First 1
        $spkey = [System.Runtime.InteropServices.Marshal]::PtrToStringAuto([System.Runtime.InteropServices.Marshal]::SecureStringToBSTR($sp.Secret))
Let me explain the last two parameters:
$spNameId – This is the Service Principal ID and will look like a GUID
$spkey – This is the password for the Service Principal. We need to use this later to create the Service Connection later but after that, we don’t really need to know it. It’s available in memory for a short time, until the next item in the loop or once the session is closed but we don’t have to store it anywhere (thus improving security).
The last thing we need to do is to create the Service Connection in Azure DevOps. I’m not aware of an official PowerShell module but there is an Azure CLI extension. The problem with the Azure CLI is that it has limited support for creating Service Endpoints (Service Connections) and is in preview. Therefore, we’ll call the REST API directly, using PowerShell:
Because that was in a foreach loop, we can easily create many Resource Groups, a Service Principal for each one, assign it Contributor rights on the Resource Group, and create a Service Connection.
Conclusion
Now, we can create Pipelines that use these Service Connections to connect to Azure Resource Manager. No passwords or secrets are kept insecurely and our Service Principals are using limited rights.
I mentioned that there was not an official PowerShell module for Azure DevOps. However, here are some community projects; I have not tried any of these: